TECHNICAL SOLUTION: EDUCATIONAL MATERIAL
Name of solutionSOLAR RACER MODEL
Category of solution
> Science toy for educational purposes > Electricity production [LINK] |
PDF version to download
Related Energy School
> Renewable energy | ||||||
Short introSolar Racer Model demonstrates alternative energy concepts while incorporating problem solving, design and modeling. It is a simple device which can be used in school science projects. Construction of this model also gives students experience of using hand tools as they have to make everything by themselves. The PV cell of the Solar Racer Model generates voltage of 6 V, current - up to 50 mA, power capacity - up to 300 mW. |
|
Complexity and cost of building and operatingBuilding and operating:
Low - Medium (partially DIY, medium maintenance/operating complexity) Some parts of the model are prefabricated and some must be made by hand. Main parts: cardboard, plastic plate or foam plate for the body of the car, DC gear motor as a drive train and several plastic wheels for the chassis. Cost: Cost of the materials for this model can reach up to 20 Euros.
|
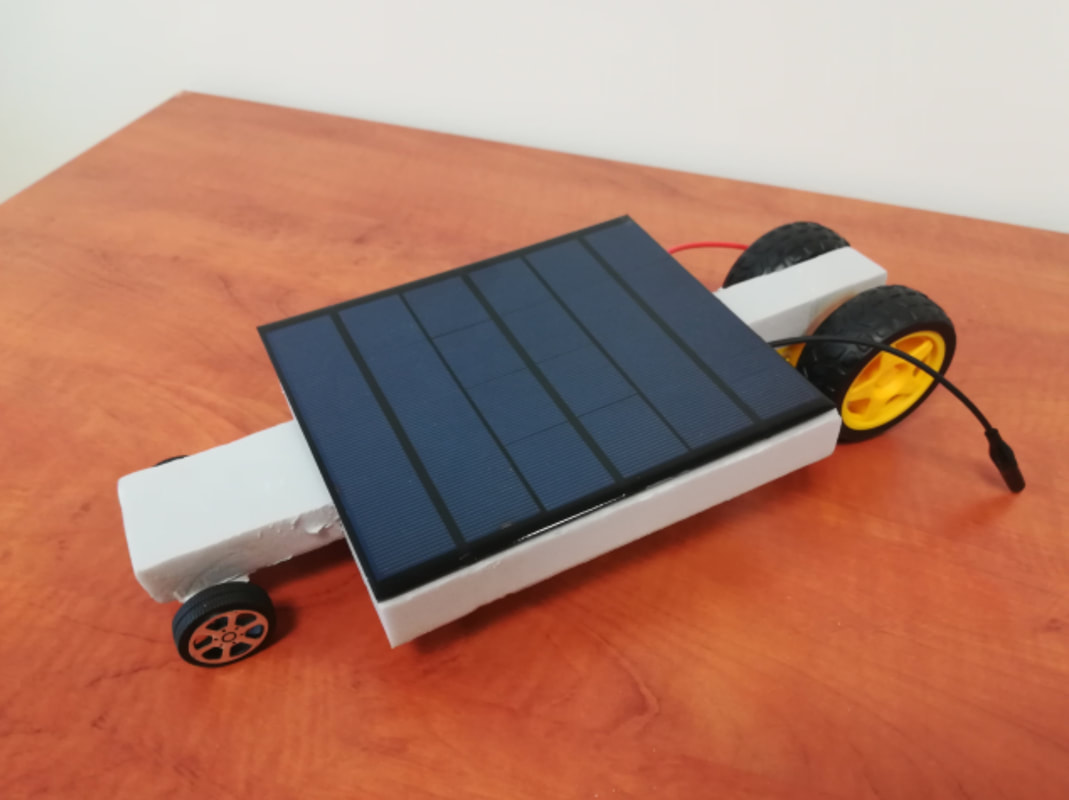
Description of the solutionThis solar car model is only one of the many possible versions and designs. It is rather simple as it comes without any electronics or switches. The main working principle is a DC geared motor driven by a power source – PV cell, which generates power from the sunlight or artificial lighting. Our car model comes without batteries, so as soon as first sunlight hits the solar panel the car starts moving and it won't stop until it meets the obstacle or runs into the shade. For this reason it is recommended to use artificial lighting sources to be able to control the power source. The model allows students to explore basic solar energy production principles and power output dependence on the light intensity. Most parts are available to purchase as ready-to-use, but hands-on activities also are necessary to put everything together and make the car model go. Technical illustrations
|
|
Skills, tools & materials requiredSkills:
No specific skills are required when building the model. Tools:
- a set of soldering-iron - hot glue gun Materials:
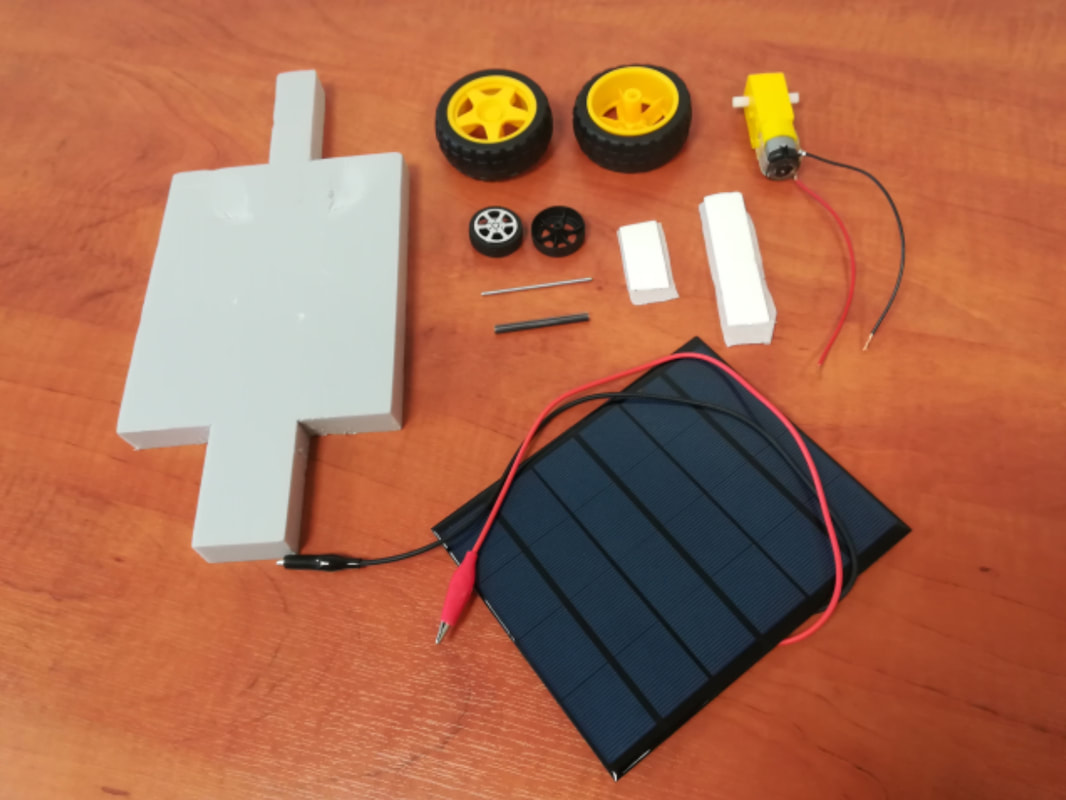
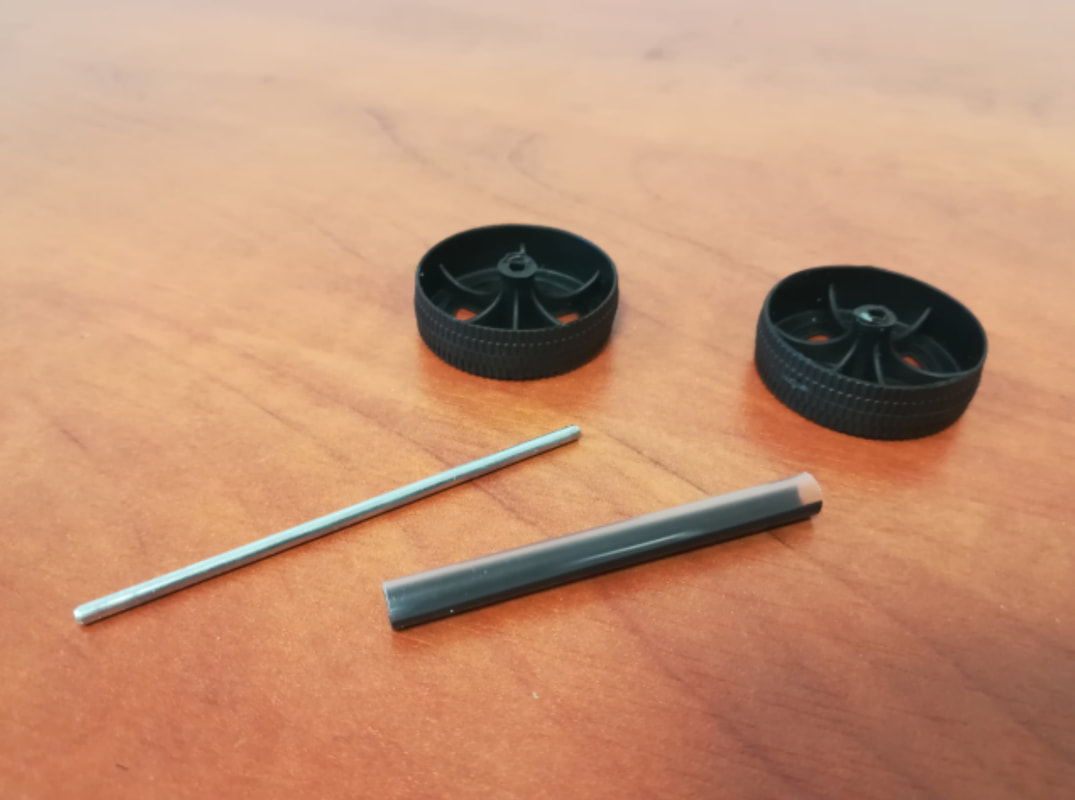
To make this solar car model at home one will need some simple materials, instruments and parts which need to be purchased: - rectangular piece of plastic or foam board (5-20 mm thick, 300X150 mm) - PV cell (at least 6 V, 130X160 mm) - DC gear motor (1:48), like this one: https://www.tinyosshop.com/index.php?route=product/product&product_id=511 - thin isolated wires of two colours (up to 0,5 m) - two metal alligator clips - a set of wheels: two bigger for the back and two smalle for the front - a small metal stick (1,5 mm thick and 6 mm long) - plastic straw (5 mm diameter and 50 mm long) - two sided sticky tape - scotch tape |
Conclusions and errors to avoidThere are several challenges and key parts you will need to think about when it comes to designing your vehicle: The Chassis First you need something on which to mount your solar panel, motor, battery holder, gears, and wheels. This main support structure is called the chassis. Suggested materials for the Chassis: foam core, wood, corrugated cardboard, styrofoam, and some plastics. Wheels Wheels can be made of different round materials and parts of other devices, and the most important step is to attach them correctly to the chassis and connect to the motor. In our case wheels were purchased together with the DC gear motor which has a special axis suitable for these wheels to put. Another problem that wastes energy is poor wheel alignment. When the wheels on your vehicle are not lined up properly, some of the wheels must slide sideways. When the driven wheels try to pull the car one way, but the rest of the car wants to roll the other way, the traction in the wastes quite a bit of energy. Also, make sure that the axle goes through the center of the wheel. Taking time to align the wheels carefully the first time will make a huge difference in how well your car runs Power Source The purpose of the solar panel is to capture energy from the sun and to turn this energy into electrical energy. The electric motor then uses this electrical energy to power the wheel of the solar car. As our car model is designed to be used with an artificial light source (powerful lamp or floodlight), the power and consequently the speed of the car model can be controlled by bringing the light source closer to the solar panel. Transmission A car’s transmission transfers the power from the motor to the wheels. While doing so, it may make the wheels spin at a different speed than the motor. You can use different types of transmissions: 1. Direct drive: the wheel is directly connected to the motor, so every time the motor rotates once the wheel rotates once. 2. Pulley (or Belt) drive: The motor turns a pulley, which is connected by a belt (like a rubber band that doesn’t stretch) to another pulley, which is connected to the wheel. So the motor turns the first pulley, which turns the second pulley, which turns the wheel. The size of the pulleys affects how many motor rotations it takes to make the wheel rotate once. 3. Gear drive: The motor turns a gear, which turns a second gear, which then turns the wheel. Like the pulley drive, the size of the gears affects how many motor rotations it takes to make the wheel rotate once. The difference in the size of the two gears (or pulleys) is called the gear ratio. In our case we used a DC motor with the gear ratio 1:48. |
Ideas for activitiesThe most fun part is to see the model go – it means you did everything right, gained new technical knowledge, solved a number of engineering problems and improved your construction skills. This model can be used for demonstrational and educational purposes. It can serve as a basis for further technical improvement of a solar car as there are many possible solutions and design versions (with battery or supercapacitor, different drive train, connection scheme, remote control, etc.). To make more fun of it, you can organize a solar car model race in a classroom or any other larger room. All you would need is a powerful light source (at least 300 W halogen lamp). If you organize the race outside on a sunny day, think off a way to stop the car after the finish: it can be any soft material (foam, rubber, textile, etc.) or simply grass. |
|
Cost & Life cycle analysisCost:
The cost of the model is about 20 Euro. LCA: Not applicable - No analysis has been made |
|
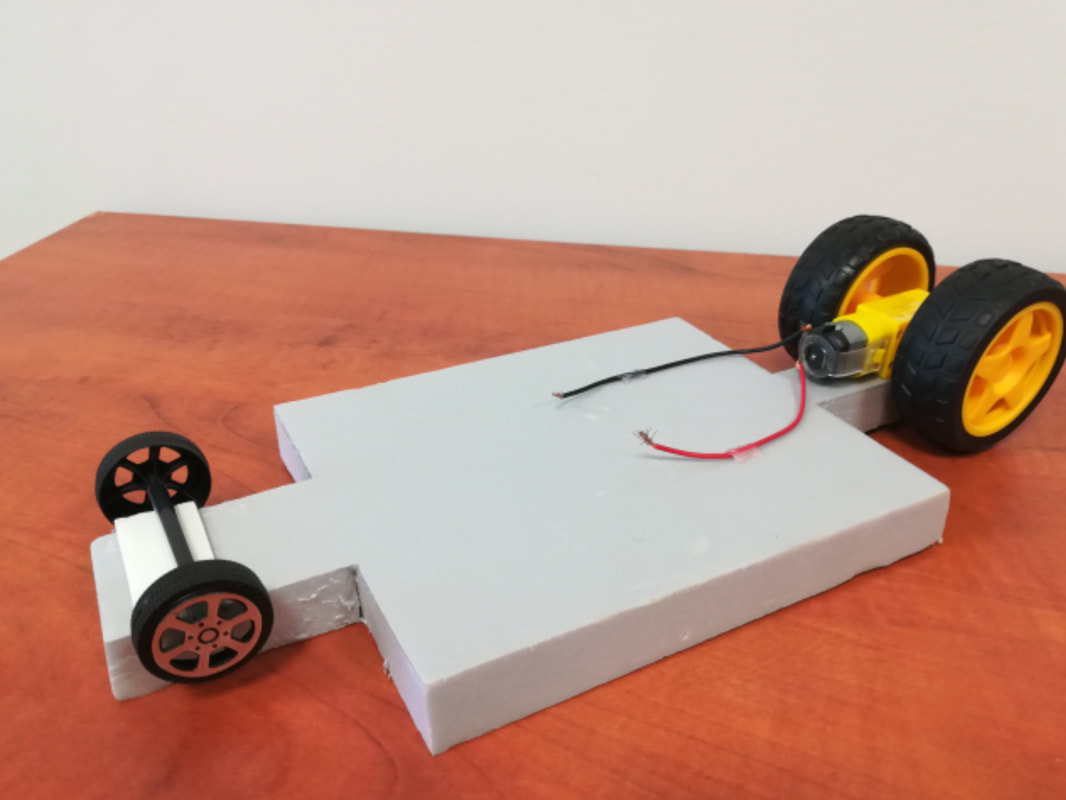
Step by step guidelines for building the solution1. Prepare the car chassis
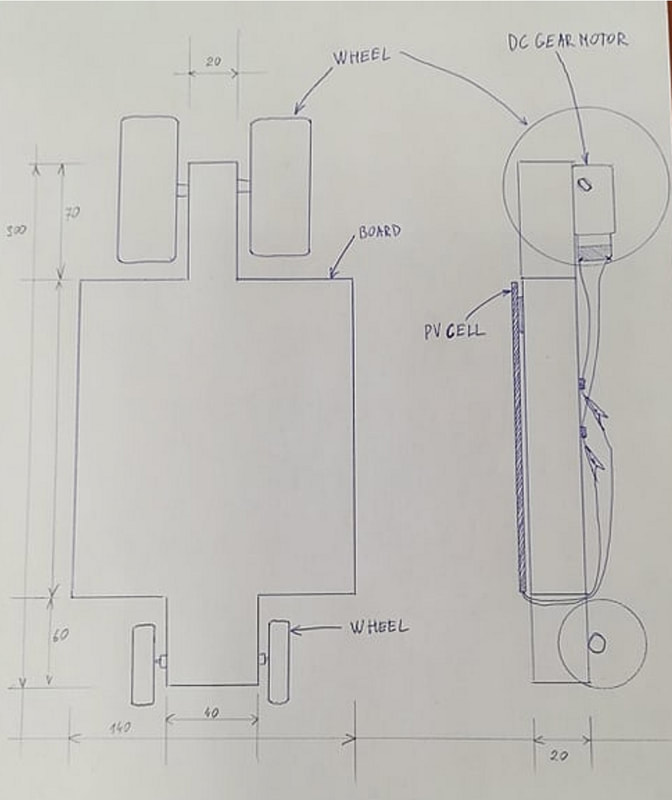
Take a piece of foam board and cut a rectangular shape with dimensions 150X300 mm. Then cut a special form out of it shown in technical drawing. The narrow part will be the car's back side with the drive wheels. 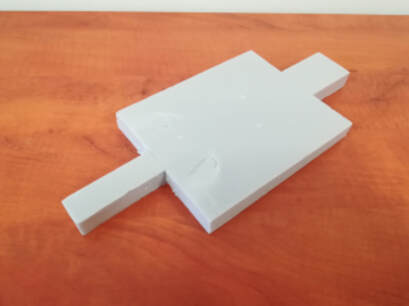
Step 1, the chassi
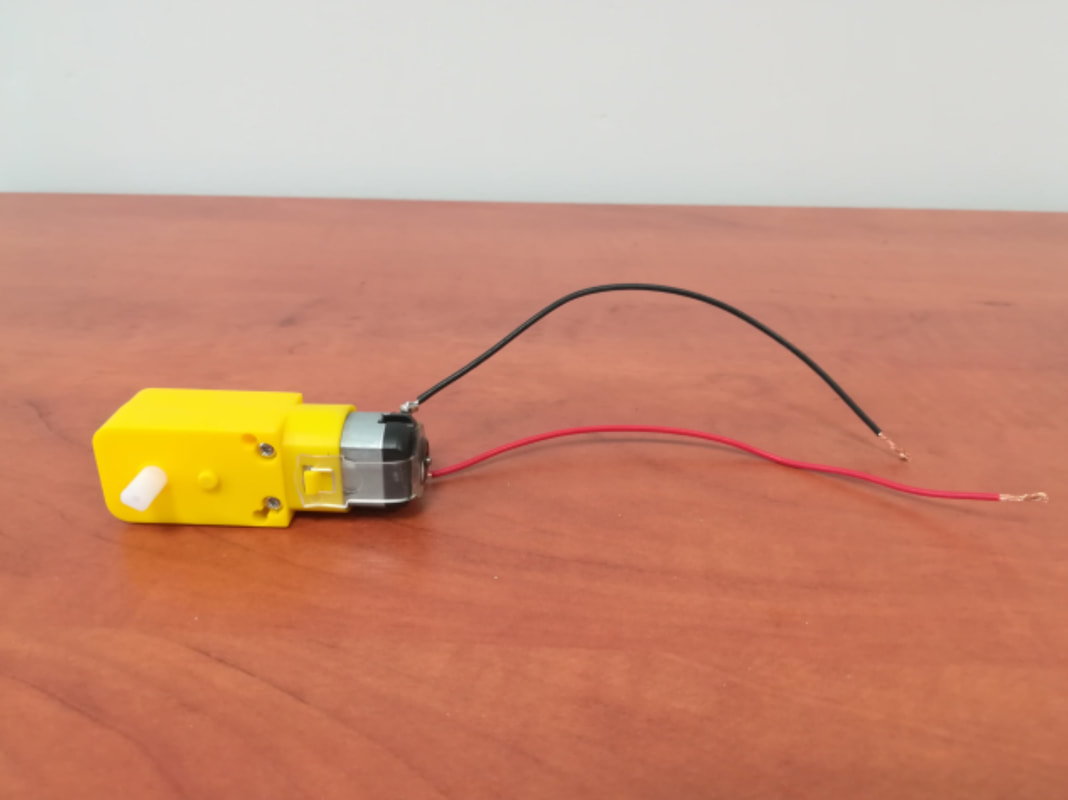
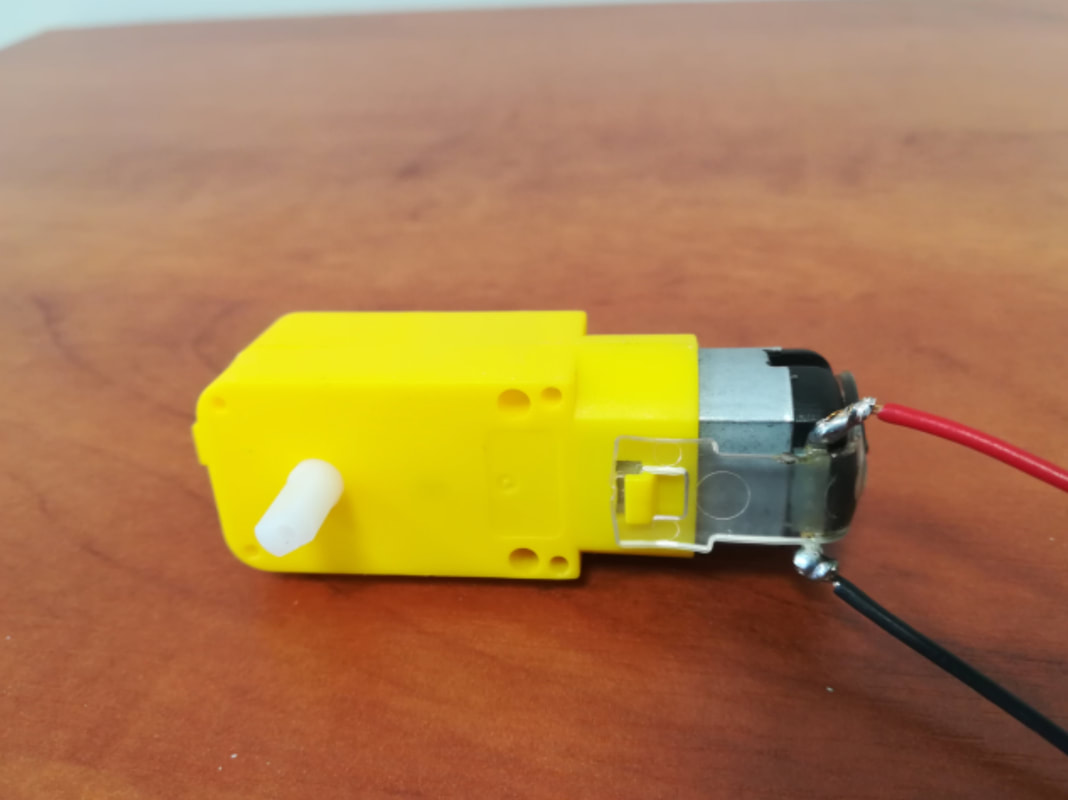
2. Prepare the DC gear motor
DC gear motor 1:48 comes without wires, so you will have to cut two pieces of wire (13-15 cm, preferably of different colours), strip both ends and solder carefully one end of each wire to the metal contacts of the motor.
3. Attach the motor to the chassis
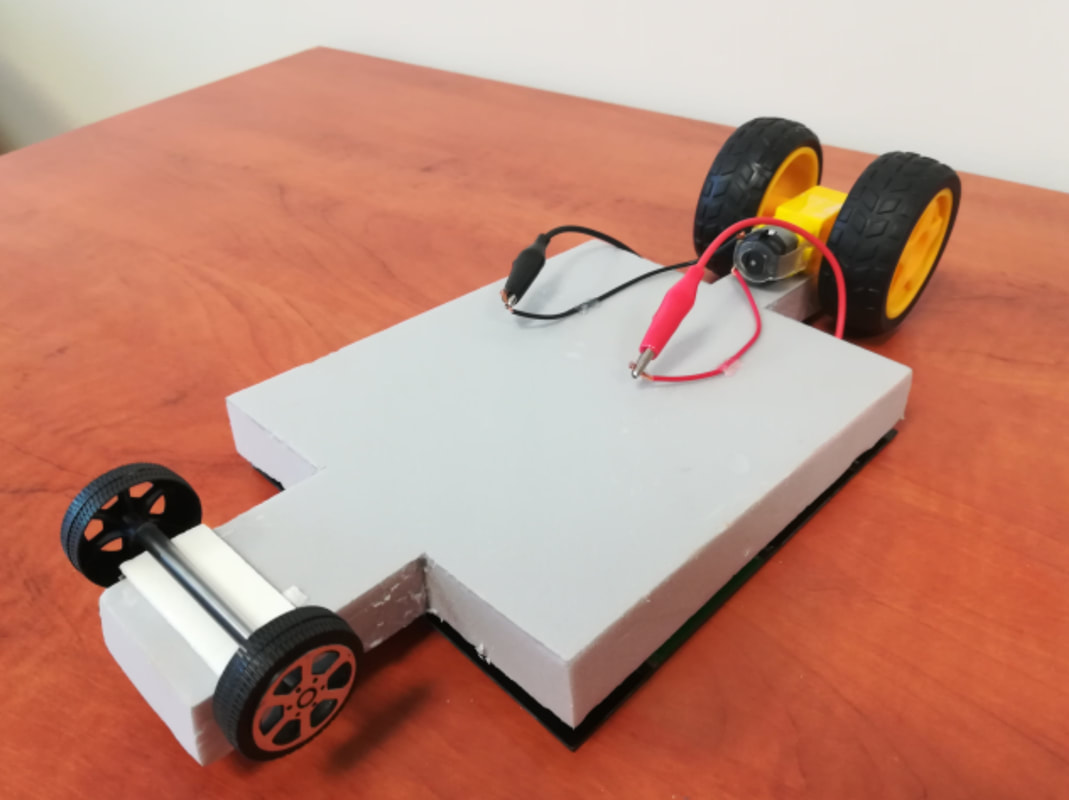
Put the motor on the narrow end of the chassis and position both axises horizontally. Make sure the axises are far enough from the edge of the wide part of the chassis so that wheels can spin freely. Then attach the motor to the board with a duct tape or scotch tape. Attach the loose wire ends to the board with hot glue as shown in the picture. Stripped wire ends must be left unglued. 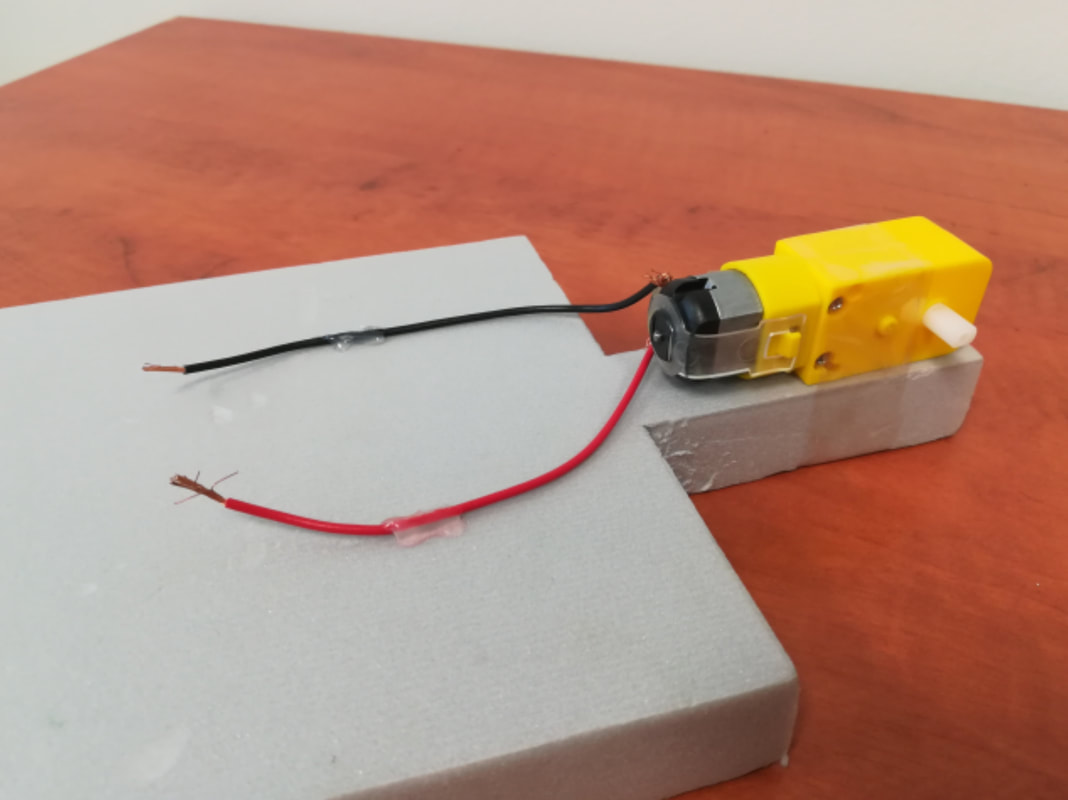
Step 3, attach the motor to the chassis
4. Prepare and attach the set of front wheels
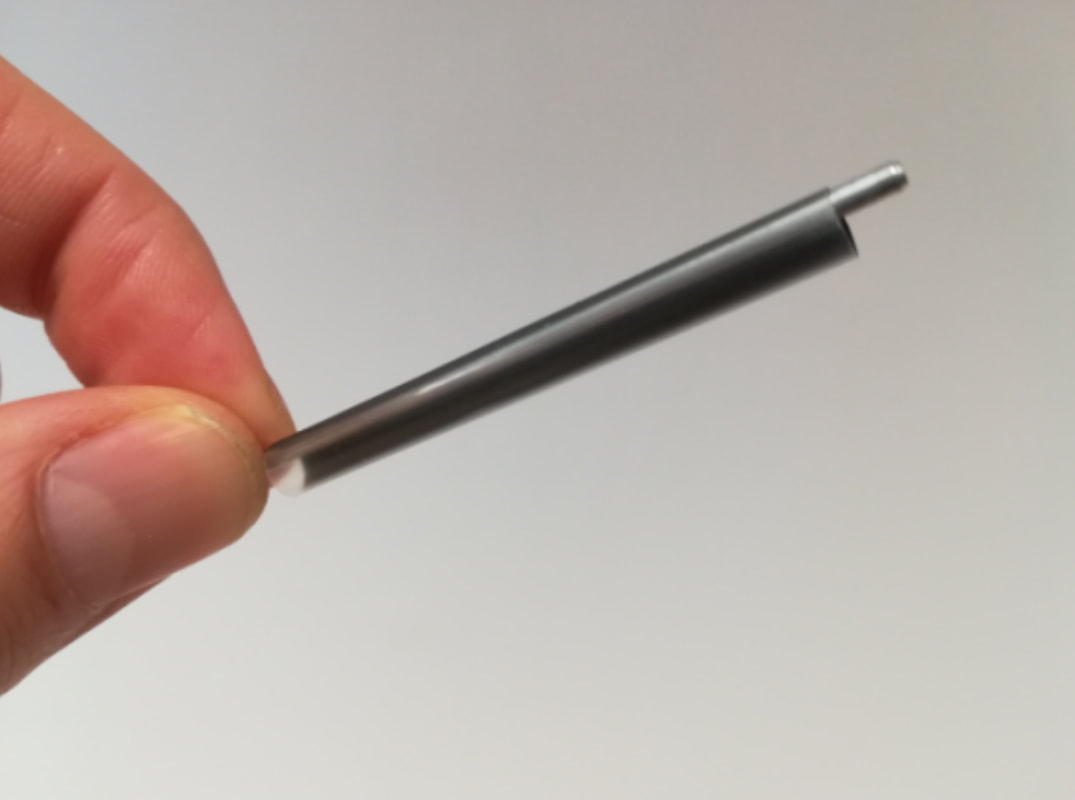
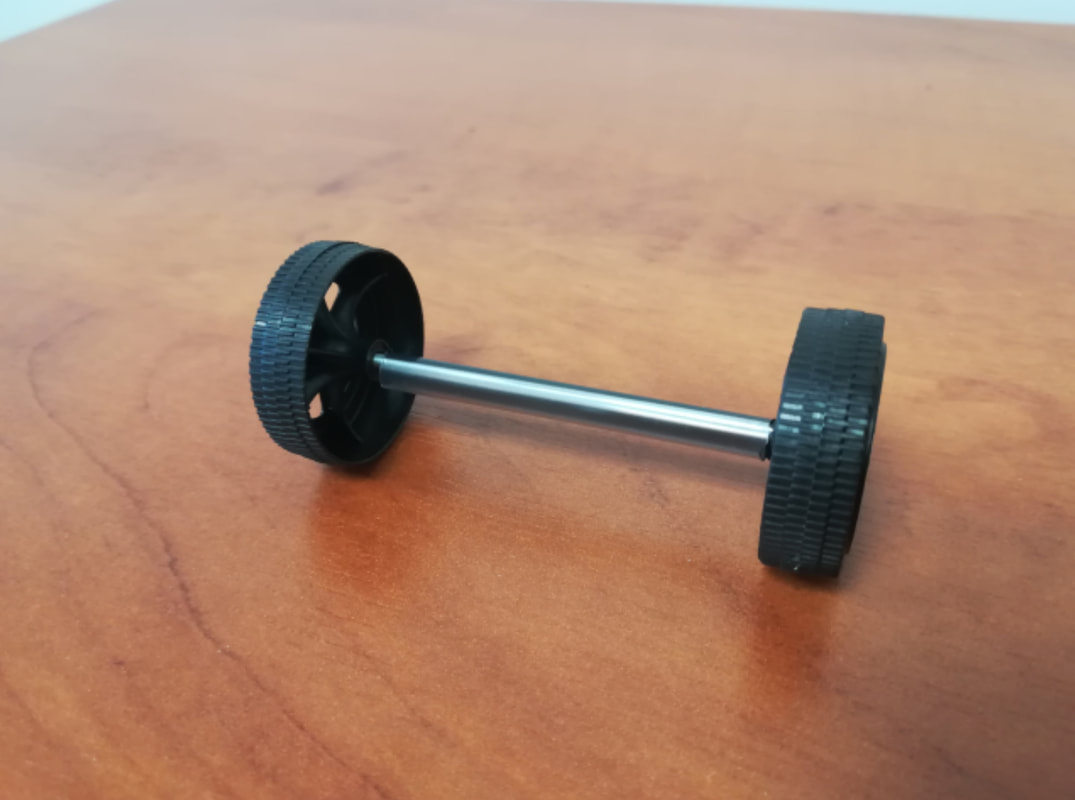
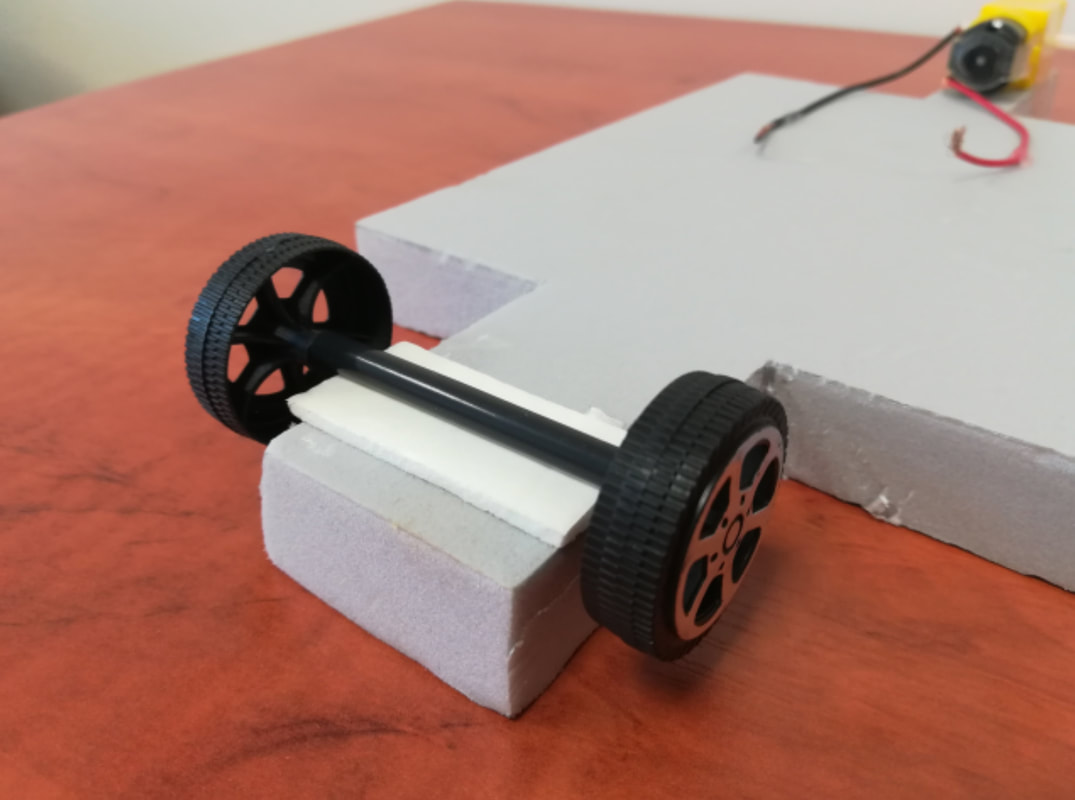
Cut a piece of plastic straw – make it shorter than the metal axis, put the axis through the straw and fit the wheels on both ends. Wheels should spin freely without friction to the straw. Attach the straw to the wider end of the chassis with help of two sided sticky tape or hot glue. Make sure wheels are aligned perpendicularly to the length of the chassis. If there is a misalignment, the car model may not go straight forward and fall out of the track.
5. Attach the back drive wheels
Back drive wheels may by purchased together with the gear motor (e.g. https://www.duino.lt/vaziuokles/13684-arduino-vaziuokles-komplektas.html?search_query=2D+vaziuokle&results=6). They should fit easily on both plastic axis of a gear motor. Make sure they do not rub against the foam board. Having done this, the car model is prepared to attach the last part – the power source, which is a solar panel.
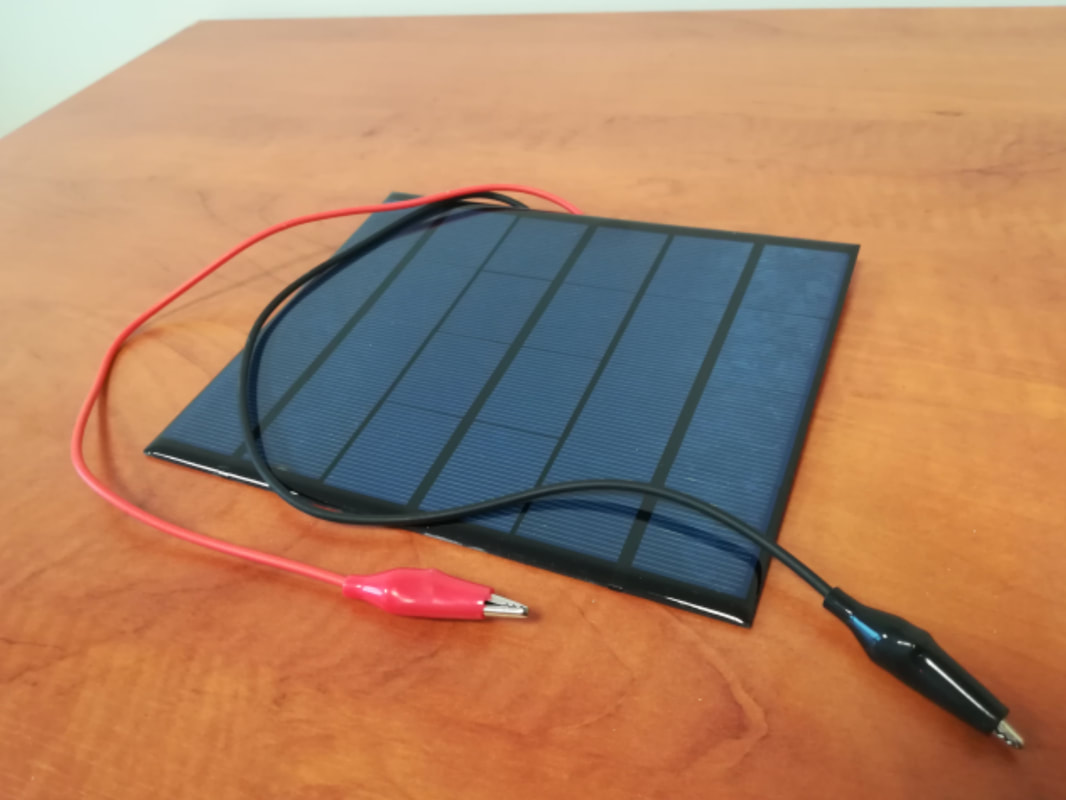
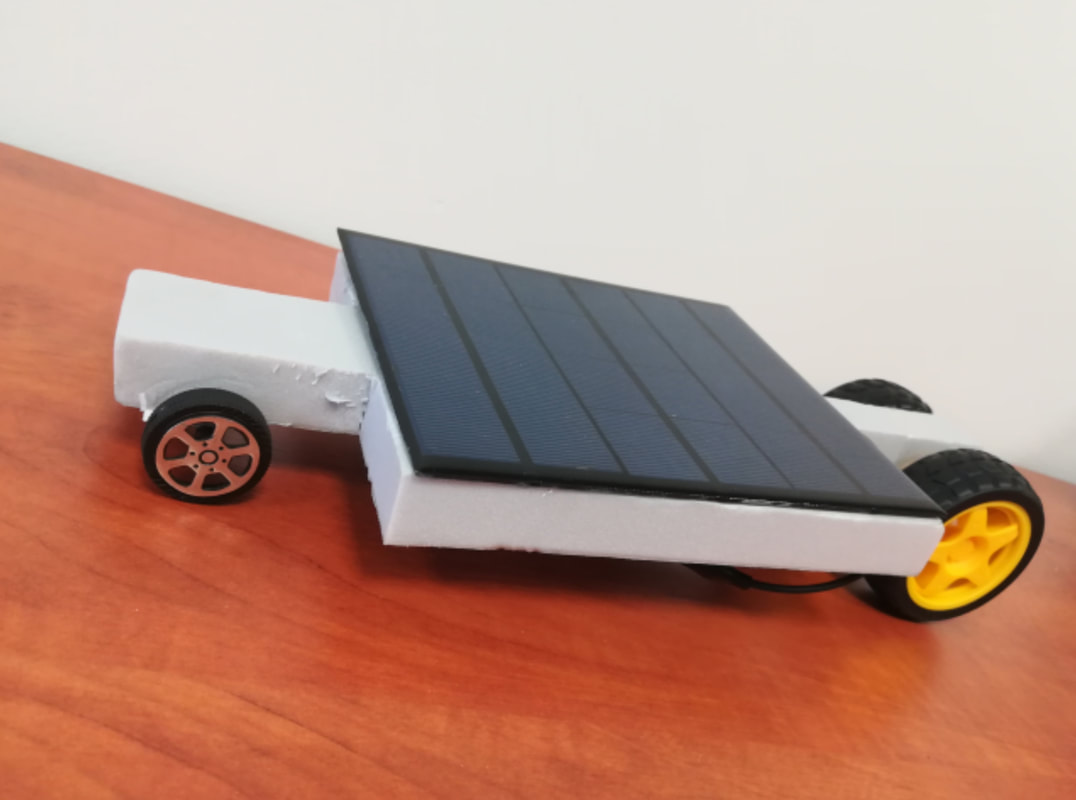
6. Prepare the solar panel
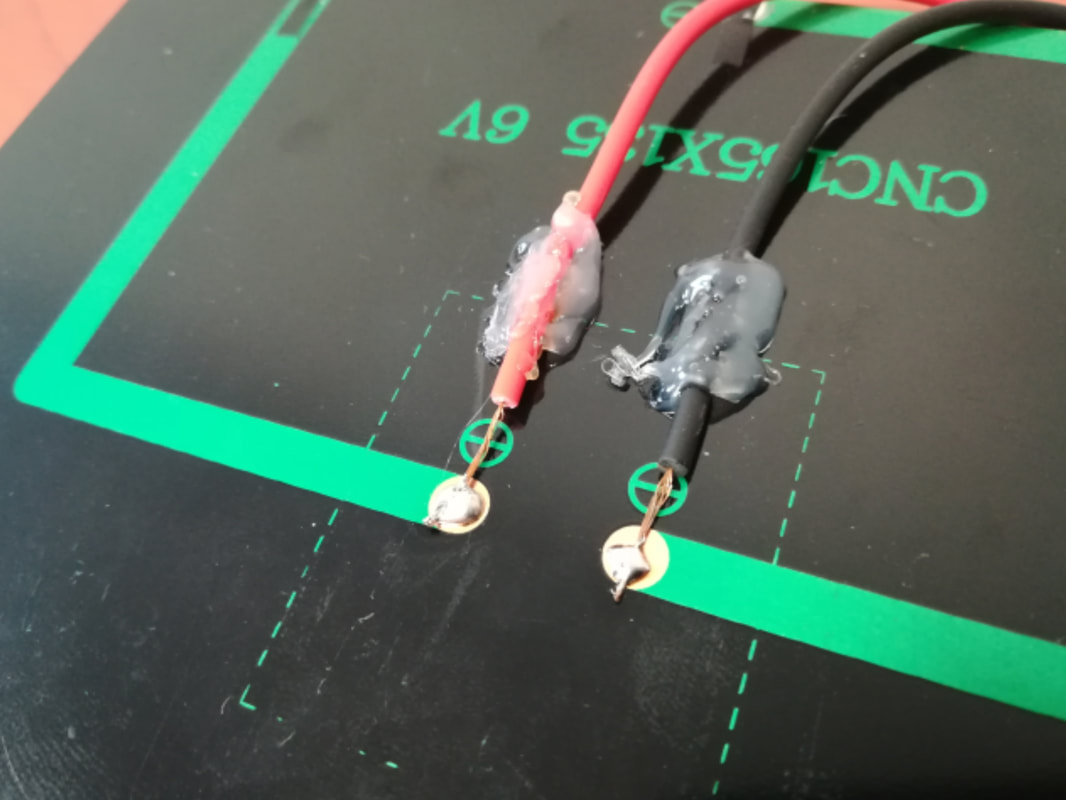
Solar panels usually come without wires, so you have to attach them yourself. First prepare two wires with an alligator clip on one end and a stripped tip on the other end (length 20-25 cm). It's a responsible task to attach the wires correctly as the soldered tips have to stay stable to prevent a break off. Once you have soldered the metal tips to the contacts in the middle of the panel, carefully hot glue the last few centimeters to the surface and make sure they do not come off easily.
7. Attach the solar panel to the chassis
Put the solar panel on the chassis and attach it with a two-sided thick sticky tape. Turn the car model over and connect the alligator clips to the stripped ends of the motor wires. Double check the length of solar panel wires – aren't they too long and won't they touch either back wheels or ground? The last thing to do is to check if the car goes the right direction: bring the lamp closer to the solar panel – the car should start moving either forward or backwards. If it goes backwards, simply switch the wires with alligator clips.
YOUR SOLAR RACER MODEL IS FINISHED AND READY TO GO!
|
|

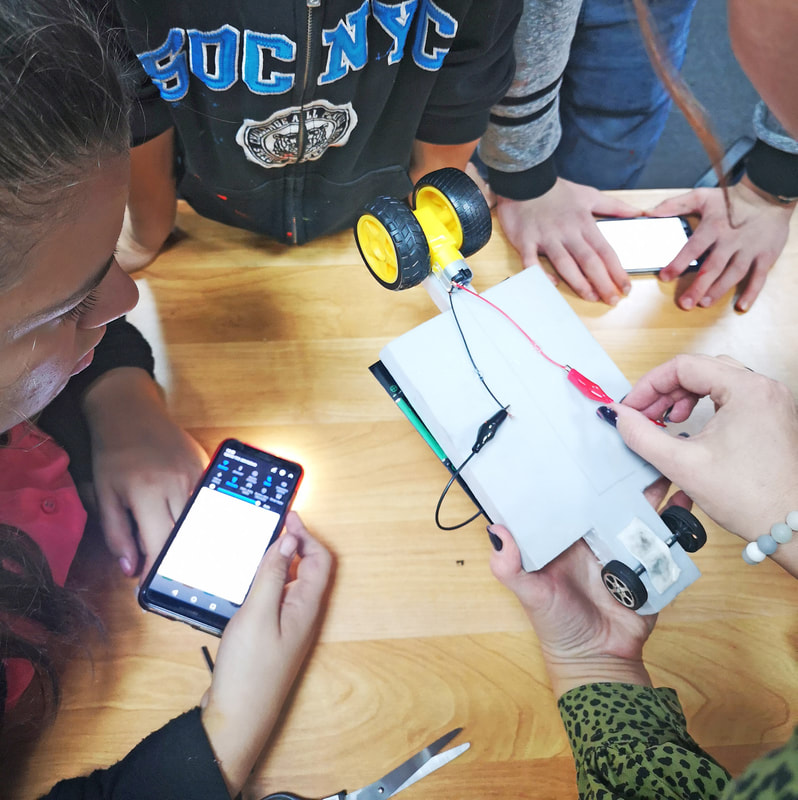
VideosVideo from Kaišiadorys LAG workshop |
|
Relevant links and articlesIdeas on solar car construction and race organization can be found here:
https://www.memphis.edu/herff/2017_final_mlgw_solar_car_race_rules.pdf Other solar car designs: https://old.miniscience.com/kits/CAR_SOLAR/ https://www.pinterest.com/pin/132996995232287842/?lp=true Local prototypein schools of Kaišiadorys district, students retained prototypes after the workshop.
Who are the people, community, institution and/or organisation operating the prototype?Schools
Experts involvedDr. Mantas Marciukaitis, Head of the Laboratory for Renewable Energy and Energy Efficiency at Lithuanian Energy Institute (www.lei.lt).
Contact informationKaišiadorys Local Action group, Lithuania (www.kaisiadorysvvg.lt)
Author of the content-
ReferencesNo references.
|
|
|
|
|